Needles and Thread
Why you need this: In emergencies, a basic sewing kit lets you fix torn clothes and gear fast, preventing exposure and keeping your family safe.Needles and Thread: The Compact Repair Essential for Everyday Life and Emergencies
Needles and thread are simple tools that solve surprisingly complex problems. At their core, they allow you to reconnect torn materials, reinforce stress points, and restore function to clothing and gear. In everyday life, a tiny stitch can save a favorite jacket, prevent a wardrobe malfunction, or keep outdoor equipment working. In emergencies, this compact kit can be the difference between staying warm and dry or being exposed to the elements, and between functioning gear and equipment failure at the worst moment.
Because they’re small, inexpensive, and easy to learn, needles and thread belong in every home drawer, travel kit, vehicle glove box, and go-bag. They offer a rare combination of low cost, high utility, and long shelf life, making them a smart addition to any preparedness plan. While they are not medical devices and should not be used to close wounds, they can firmly secure bandages and fabric supports, patch shelters, and keep clothing functional until proper repairs are available.
How It Works
At a basic level, a needle’s point pierces the material, the eye carries thread through the hole, and repeated stitches distribute load along a seam. Friction and knotting lock the thread in place, while stitch patterns control strength and flexibility. The right combination of needle type, thread type, and stitch length is what creates a durable repair.
- Needle anatomy: The point opens the path, the shaft defines strength and flex, and the eye holds the thread. Smooth, burr‑free eyes reduce fraying.
- Point styles: Sharp tips for woven fabrics; ballpoint tips for knits; wedge or triangular tips for leather and heavy canvas; curved needles for tight spaces or upholstery.
- Thread choices: Cotton blends for natural fibers and everyday garments; polyester for general purpose; nylon or waxed thread for heavy gear; specialty threads for UV resistance or abrasion.
- Stitch mechanics: Running stitches are quick but moderate in strength; backstitches interlock for high strength; whipstitches or overcast stitches bind edges and prevent fraying.
- Durability factors: Material match, stitch spacing, seam allowance, and even tension all influence how long a repair lasts.
When Needles and Thread Help Most
- Natural disasters: Patch a tarp or tent fly to keep out wind and rain, reattach straps on backpacks, reinforce a shelter tie‑out, secure reflective tape to outerwear, or fix a sleeping bag seam for warmth.
- Home accidents: Mend a split seam before work, reattach buttons, fix ripped pockets, hem pants on the fly, repair curtains or linens, or reinforce pet gear that’s starting to tear.
- Workplace situations: Tidy uniforms, secure name patches, reinforce tool pouches, stitch a loose seam on a work bag, or fix fabric organizers—without relying on power tools.
- Vehicles: Repair minor rips in fabric upholstery, stitch a loose trim panel, or patch a soft cargo organizer. Do not attempt to repair safety‑critical components like seat belts or airbag covers.
- Outdoor activities: On the trail or water, mend backpacks, tent mesh, rain gear, sailcloth, gaiters, and outerwear. Reinforce webbing loops or lash small accessories to keep gear mission‑ready.
Strengths, Suitability & Limitations
Strengths
- Ultra‑portable: A complete kit fits in a pocket, pouch, or tin.
- Versatile: Works on clothing, packs, tents, upholstery, and more.
- Low cost, high value: Extends the life of gear and reduces waste.
- No power required: Reliable in blackouts and remote locations.
- Quiet and precise: Ideal for discreet or delicate fixes.
- Long shelf life: Quality steel needles and synthetic threads store well for years when kept dry.
What It’s Not For
- Closing human or animal wounds. Do not suture skin with household needles and thread.
- Repairing safety‑critical gear such as seat belts, climbing equipment, or life‑safety harnesses.
- Fixing high‑temperature, pressurized, or electrical components.
- Replacing structural repairs where adhesives, rivets, or professional services are required.
Limitations and safety considerations
- Needle sticks are possible; use a thimble and store needles in a protective case.
- Rust and burrs weaken needles and cut thread—inspect regularly and replace damaged items.
- Some threads can degrade in UV light, heat, or chemicals; choose materials suited to your environment.
- Allergic sensitivities to metals or fibers are possible; discontinue use if irritation occurs.
- Keep out of reach of children and pets; account for every needle before and after use.
What to Look For When Buying Needles and Thread
Picking the right kit ensures reliable, frustration‑free repairs. Focus on material quality, variety, and safe storage. Beware of low‑quality imitations that cut corners on metals and fibers.
- Assorted needle types: Include sharps for woven fabrics, ballpoints for knits, leather needles for hides and canvas, and curved or extra‑long needles for upholstery and hard‑to‑reach areas.
- Size range: Fine needles for delicate fabrics and small stitches; heavier gauges for denim, canvas, and webbing.
- Build quality: Smooth, polished eyes; consistent diameter; straight shafts; even plating or corrosion‑resistant finish.
- Thread selection: All‑purpose polyester for everyday use, nylon or waxed thread for heavy repairs, and neutral colors (e.g., black, white, gray) to cover most garments.
- Durability notes: Look for abrasion resistance, minimal lint/fuzz, colorfast dyes, and, if needed, UV‑resistant options for outdoor gear.
- Helpful accessories: Thimble, small scissors, needle threader, seam ripper, safety pins or clips, measuring tape, and a few fabric patches. A small block of wax or thread conditioner reduces tangles.
- Protective case: A rigid, closable, clearly labeled container keeps needles from escaping and prevents moisture damage. Needle organizers or magnetic holders improve safety.
- Warning signs of low quality: Flaking plating, burrs in the needle eye, easily kinked thread, vague or missing fiber labels, inconsistent sizing, or strong chemical odors.
Placement, Storage & Readiness
Smart placement means you’ll actually use your kit when it matters. Keep a small set where problems occur most and a more complete kit where you stage gear.
- Where to keep it: One kit at home, a travel‑size kit in your bag, a compact kit in your vehicle, and a workplace kit for quick touch‑ups.
- Moisture control: Store in a dry container; add a small desiccant packet if humidity is an issue. Avoid storing on damp basement floors or in leaky trunks.
- Pre‑thread for speed: Keep a couple of needles pre‑threaded with neutral colors and secured in a felt strip or needle book.
- Inspection routine: Quarterly, check for rusted or bent needles, frayed thread, empty colors, and dull scissors. Replace on the spot.
- Label and inventory: Note contents, sizes, and last inspection date. This prevents discovering missing essentials when you need them most.
- Common mistakes to avoid: Loose needles floating in a kit, thread left unprotected in sun or heat, and storing kits out of reach of the places you actually sew.
How to Use It Properly
The following safe, simple sequence covers a basic backstitch seam repair that works for most torn clothing and gear. Practice on scrap fabric first to build confidence.
- Assess and prepare: Clean and dry the area. Trim loose threads. If the fabric is badly frayed, consider adding a small patch behind the tear for reinforcement.
- Choose tools: Select a needle and thread matched to the material (finer for light fabric, heavier for canvas or denim).
- Measure and condition: Cut a forearm‑length piece of thread to reduce tangles. Optionally wax the thread lightly for smoother pulls.
- Thread and knot: Thread the needle and tie a secure knot at the end (a double overhand works well). For extra hold, tie a second knot on top of the first.
- Align and secure: Bring fabric edges together with a few safety pins or clips. Maintain a small seam allowance to prevent the repair from pulling out.
- Start the stitch: From the inside of the fabric, take a small stitch to anchor the knot. Step back one stitch length and push the needle forward two stitch lengths—this is a backstitch, which creates a strong, interlocking seam.
- Continue evenly: Keep stitches consistent (shorter stitches usually mean stronger seams) and tension snug but not puckered.
- Finish and lock: At the end, take two or three backstitches in place to lock the seam. Tie a small knot, bury it between fabric layers if possible, and trim the tails.
- Test gently: Flex the seam to ensure it holds. If it gaps, add a few more reinforcing stitches or a whipstitch along the edge.
- Clean up: Account for every needle and pin, store tools safely, and note any supplies to restock.
Safety reminder: This guidance is for fabric and gear repairs only. Do not attempt to close wounds. For injuries, use appropriate first aid and seek professional medical care.
Final Summary
Compact, dependable, and endlessly useful, needles and thread are a preparedness staple that pay for themselves the first time they prevent a gear failure or wardrobe issue. With a small investment and a little practice, you can repair instead of replace, extend the life of your clothing and equipment, and stay functional in everyday moments and during disruptions.
Build a quality kit, stage it where you’ll use it, and keep it ready. In calm times, you’ll save money and reduce waste. In emergencies, you’ll keep your gear working when you need it most. A few stitches today can prevent bigger problems tomorrow.
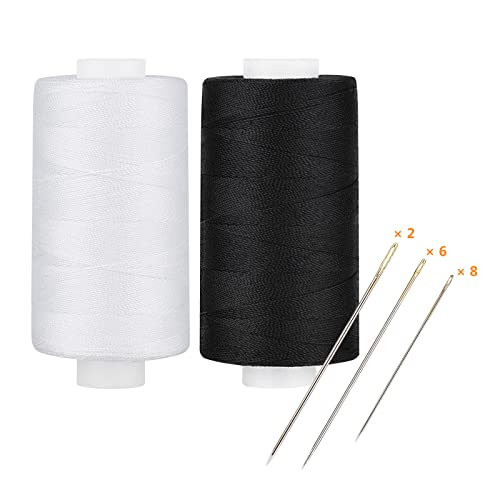
Simthread All Purpose Thread Polyester 400 Yards Each (1 White 1 Black) Best for most families
- Repairs tents, packs, straps, clothing, and tarps to prevent exposure and equipment failure.
- Works without power and stores for years when kept dry; reliable in rain, cold, or dust.
- Strong stitches distribute load and stop rips from propagating under stress.
- With sterile suture and training, supports emergency wound closure when evacuation is delayed.