Tourniquet
Why you need this: In disasters, severe bleeding kills in minutes—an emergency tourniquet stops hemorrhage fast, buying time for you or loved ones until help arrives.Tourniquet: A Complete Guide to Choosing, Carrying, and Using This Lifesaving Tool
A tourniquet is a simple, mechanical device designed to stop severe limb bleeding fast. By applying focused pressure around an arm or leg, it temporarily halts blood flow to a wound so the injured person has a better chance of surviving until professional care arrives. In situations where seconds count—serious home accidents, workplace injuries, vehicle collisions, or outdoor mishaps—the right use of a tourniquet can be the difference between life and death.
Uncontrolled bleeding is one of the most preventable causes of death in trauma. A properly applied tourniquet buys precious time for emergency responders by converting a life-threatening bleed into a controlled situation. It also fits seamlessly into everyday preparedness: stored in a glove box, carried in a first-aid pouch, or included in an office safety kit, a tourniquet is compact insurance for the unexpected.
This guide explains how a tourniquet works, when to use it, what to look for when buying, how to store it for fast access, and a straightforward, educational walk-through on proper application. It is for general information only and does not replace professional training or medical advice.
How It Works
A tourniquet controls a life-threatening limb bleed by compressing the blood vessels between the device and the bone, effectively stopping blood flow to the injury below the application point. Most modern designs use a wide strap for initial tension and a mechanical system—often a windlass or ratcheting component—to achieve the additional pressure needed to stop arterial bleeding.
- Initial tension: A robust strap encircles the limb and is pulled tight to reduce bleeding.
- Mechanical advantage: A windlass (twisting rod) or ratchet increases pressure until bleeding stops and no distal pulse is felt.
- Width matters: Wider bands distribute pressure better, helping to occlude blood flow effectively with less risk of tissue damage than narrow bands.
- High and tight placement: Placing the tourniquet high on the limb (and away from joints) gives rapid control when wound location is unclear or access is limited.
- Time tracking: Recording the time of application supports safe handoff and clinical decisions once professionals take over.
When The tourniquet Helps Most
- Natural disasters: Severe cuts or crush injuries from debris after earthquakes, storms, or tornadoes.
- Home accidents: Power tool mishaps, shattered glass injuries, or deep kitchen lacerations with heavy bleeding.
- Workplace incidents: Construction, manufacturing, or warehouse injuries involving machinery or sharp materials.
- Vehicles: Collisions, rollovers, or roadside emergencies where heavy limb bleeding is present.
- Outdoor activities: Hunting, hiking, climbing, cycling, boating, or chainsaw use far from immediate medical care.
- Community events: Crowded venues where a rapid response to an unexpected injury may be required.
Strengths, Suitability & Limitations
Strengths
- Fast hemorrhage control for severe extremity bleeding when direct pressure is not enough.
- Simple to use under stress once staged and practiced, including one-handed application for self-care.
- Compact and portable, fitting in first aid kits, glove boxes, packs, and desk drawers.
- Bridges the gap between injury and professional care during the most critical minutes.
What It’s Not For
- Not for minor cuts that can be controlled with direct pressure and bandaging.
- Not for head, neck, or torso wounds—tourniquets are for arms and legs only.
- Not a substitute for medical evaluation—professional care is still essential.
- Not for prolonged use without medical supervision; duration should be minimized and documented.
Limitations and safety considerations
- Improper placement (over joints or too distal) can reduce effectiveness.
- Insufficient tightening leaves bleeding uncontrolled; turn until bleeding stops and no distal pulse is felt.
- Extended application increases risk of tissue and nerve injury; note the time and hand off to professionals as soon as possible.
- Environmental factors (cold, mud, blood) can complicate handling—choose and stage a design you can operate with gloved or wet hands.
What to Look For When Buying a tourniquet
A reliable tourniquet should be durable, easy to use under stress, and proven to stop severe bleeding. Consider the following features before you buy:
- Material quality: Strong, tightly woven webbing; robust stitching; a sturdy windlass or ratchet that won’t flex or crack under torque.
- Effective width: A suitably wide strap helps achieve occlusion with less tissue damage risk compared to narrow bands.
- Secure hardware: Solid buckles, reliable retention for the windlass/handle, and a secondary securing strap to lock the system in place.
- One-handed usability: Devices that can be efficiently applied using a single hand are vital for self-care.
- Glove-friendly controls: Large tabs, textured rods, and easy-to-grip components make operation faster in cold or wet conditions.
- Clear time label: A designated area to mark application time supports safer handoff to medical teams.
- Training and instructions: Include or reference clear instructions; obtain practical training whenever possible.
- Evidence and testing: Favor designs with a track record in emergency response training or independent performance testing.
- Quality control: Be cautious of low-cost imitations with poor stitching, weak plastic, or misleading markings. Choose dependable build quality even if it costs more.
Warning: Counterfeit or low-quality lookalikes are common. They can fail under load, slip, or break when you need them most. Avoid suspiciously cheap options and inspect any device thoroughly before relying on it.
Placement, Storage & Readiness
Owning a tourniquet is only half the solution. Access and readiness determine whether you can use it in time.
- On-person carry: Keep one in a belt pouch, jacket pocket, or everyday carry kit. Staging matters—pre-route the strap (if applicable) so it’s ready to tighten immediately.
- Vehicle: Store in a glove box, center console, or visor-mounted pouch. Avoid prolonged exposure to extreme heat that can degrade plastics and adhesives.
- Home & workplace: Place in visible, consistent locations—kitchen, garage, workshop, office first-aid stations—alongside pressure dressings and gloves.
- Outdoor kits: Include in hiking packs, range bags, and boat kits inside a water-resistant pouch.
- Inspection: Regularly check for frayed webbing, broken stitches, cracked hardware, or worn Velcro/hook-and-loop. Replace any item showing wear.
- Training vs. live-use: Consider a training unit for practice and preserve your “live” unit for emergencies to reduce wear.
- Labeling: Keep a marker with your kit so you can record the application time clearly on the device or patient.
Common readiness mistakes include burying the tourniquet deep in a bag, leaving it in original packaging (which wastes time), or never staging the strap. Seconds matter—pre-stage and place it where you can reach it quickly.
How to Use It Properly
The following is a simple, educational overview and is not a substitute for hands-on training. If someone is seriously injured, call emergency services immediately.
- Ensure safety: Make sure the scene is safe for you and the injured person. Put on gloves if available.
- Identify life-threatening bleeding: Look for steady or spurting blood, pooling on the ground, soaked clothing, or a partially/fully amputated limb.
- Call for help: Call emergency services or direct someone to do so. Have another person retrieve the tourniquet if possible.
- Expose and assess: Expose the limb quickly if you can do so without delaying care. If you can’t see the exact site, plan to apply the tourniquet “high and tight.”
- Position: Place the tourniquet above the wound on the limb, avoiding joints. If the wound is near a joint, place the tourniquet on the limb segment above that joint.
- Pull the strap tight: Route the strap as designed and pull it as tight as possible before using the windlass or ratchet.
- Apply mechanical pressure: Twist the windlass or operate the ratchet until heavy bleeding stops and no distal pulse is felt below the tourniquet.
- Secure: Lock the windlass/handle into its holder and secure any retention strap so it cannot loosen.
- Mark the time: Write the application time on the device or directly on the patient (e.g., on the forehead or limb) where responders will see it.
- Reassess: If bleeding continues, apply a second tourniquet above the first. Do not remove or loosen the original.
- Monitor and protect: Keep the person warm, watch for signs of shock, and continue to monitor until professionals arrive.
Important reminders: Do not remove a tourniquet once applied, do not periodically loosen it, and do not place it over joints or bulky items in pockets. If your device uses a different mechanism than a windlass, follow the manufacturer’s instructions closely and train with that design.
Final Summary
A tourniquet is a compact, powerful tool that turns chaos into control when severe limb bleeding threatens a life. By understanding how it works, selecting a dependable design, staging it for fast access, and practicing simple steps, you put yourself and your loved ones in a stronger position to survive the unexpected.
Act now: Add a quality tourniquet to your first-aid kits at home, in your vehicle, and on the go. Learn to use it, rehearse the basics, and keep it within reach. Preparedness is not complicated—it's consistent. A few minutes of planning today can save a life tomorrow.
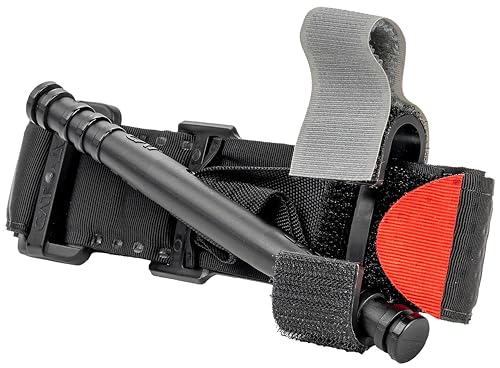
North American Rescue C-A-T Combat Application Tourniquet (Black) NAR Genuine Gen 7 CAT Gray Time-Stamped Military Issued (30-0001) Best for most families
- Achieves arterial occlusion to stop life-threatening extremity bleeding quickly.
- Enables one-handed application for self-rescue; works over clothing and gloves.
- Wide, high-strength strap and locking windlass resist slip and failure.
- Time label supports clear handoff and medical decision-making by responders.