Jumper Cables
Why you need this: You need jumper cables so a dead battery in an emergency doesn't leave you stranded, keeping your family safe and mobile.Jump Cables: A Complete Guide to Safe Boosting, Smart Buying, and Everyday Preparedness
Jump cables—also known as jumper cables or booster cables—are a simple, powerful tool designed to bring a dead vehicle battery back to life by connecting it to a healthy one. In the real world, batteries fail for all kinds of reasons: cold snaps, lights left on, old age, or a charging system that isn’t keeping up. Having a sturdy set of jump cables in your vehicle turns a stressful delay into a quick fix, helping you avoid tow fees, missed appointments, and unsafe roadside waits. Prepared drivers keep jump cables in every car, truck, RV, and work vehicle because they’re affordable, reliable, and universally useful.
Unlike gadgets that need recharging, jump cables are always ready. They use the donor vehicle’s electrical system to provide the surge a drained battery needs to crank the engine. When used properly, jump cables restore mobility in minutes and can be the difference between getting home safely and being stranded in an inconvenient or dangerous location.
How It Works
Jump cables are two heavily insulated wires with spring-loaded clamps at both ends. One cable is positive (usually red) and the other is negative (usually black). The positive cable connects the positive terminal on the disabled battery to the positive terminal on a running donor battery. The negative cable completes the circuit by connecting the donor’s negative terminal to a safe, unpainted metal ground point on the disabled vehicle. This temporary bridge supplies enough current to turn the starter motor, and once the disabled engine is running, its alternator begins recharging the battery.
- Polarity matters: Red to positive (+), black to negative (−) or a designated ground point. Reversing connections can damage electronics.
- Gauge and length influence performance: Thicker wire (lower AWG number) carries more current with less voltage drop. Longer cables reach farther but must be thick enough to handle the distance.
- Quality clamps ensure solid contact: Wide jaws, strong springs, and conductive teeth help bite through oxidation and deliver consistent power.
- Ground away from the battery: Connecting the final black clamp to an engine block or frame reduces the risk of igniting hydrogen gas near the battery.
- Alternator takes over: After the disabled vehicle starts, the alternator replenishes the battery so you can drive and complete the charge.
When Jump Cables Help Most
- Natural disasters and extreme weather: Cold snaps sap battery capacity, while evacuations and long idling periods strain charging systems. A quick boost keeps you moving when local services are overloaded.
- Home and everyday accidents: Interior lights, door-ajar lamps, or accessory use can drain a battery overnight. Jump cables turn a no-start morning into an on-time departure.
- Workplace and job sites: Fleet vehicles, trucks with power-hungry equipment, or tools charged from the vehicle often need a fast assist to keep projects on schedule.
- Vehicles of all kinds: Cars, SUVs, trucks, motorcycles, lawn tractors, ATVs, small boats, and RV house batteries with compatible 12‑volt systems can often be boosted safely.
- Outdoor and travel adventures: Remote campsites, trailheads, marinas, and rural roads aren’t always near help. A compact set of jump cables is a must-have for self-reliance.
Strengths, Suitability & Limitations
Strengths
- Immediate power on demand: No charging period required—use the donor vehicle’s electrical system for an instant boost.
- Cost-effective preparedness: Durable, reusable, and useful across multiple vehicles, including friends’, family’s, and coworkers’ cars.
- Low maintenance: No internal battery to charge; store and inspect periodically.
- Versatile: Works in cold, hot, and remote environments when other tools aren’t available.
- Long service life: Quality copper conductors and robust clamps can last for years.
What It’s Not For
- Not a permanent fix for a failing battery, weak alternator, or corroded terminals—those issues need repair or replacement.
- Not for mixing incompatible systems (for example, 12‑volt to 24‑volt). Always match voltage and follow the vehicle manuals.
- Not for damaged, cracked, frozen, or leaking batteries—stop and address the hazard first.
- Not a substitute for proper charging equipment when long, slow charging is required.
Limitations and safety considerations
- Sparking risk: Connect and disconnect in the correct order, and keep the final ground connection away from the battery.
- Modern electronics: Some vehicles have sensitive electrical systems. Consult the owner’s manual for jump-start instructions and designated jump points.
- Heat and insulation: Low-quality cables overheat under load; use properly rated wire and clamps.
- Physical hazards: Keep cables clear of belts, fans, pulleys, and hot exhaust components.
- Personal safety: Wear eye protection and gloves; remove dangling jewelry; keep children and pets away.
What to Look For When Buying Jump Cables
Good jump cables save time and protect your vehicle’s components. Focus on conductor quality, clamp performance, insulation, and proper sizing. Beware of imitations that exaggerate wire thickness or amperage ratings; trustworthy cables feel substantial, hold tight, and stay flexible in the cold.
- Wire gauge (AWG): Lower numbers mean thicker wire and higher current capacity. Choose a gauge that matches your heaviest vehicle and climate. Thicker cables reduce voltage drop and improve cold-weather cranking.
- Length: 12 feet is a practical minimum, while 16–20 feet offers more reach in parking lots, driveways, and tight shoulders. If you go longer, compensate with thicker wire to maintain performance.
- Conductor material: Pure copper provides excellent conductivity and flexibility. Copper-clad aluminum is lighter and often less expensive but can be stiffer and less efficient; choose quality builds if selecting CCA.
- Clamp design: Look for wide jaws, strong springs, and deeply toothed, conductive contact surfaces that bite through oxidation. Rotating or “parrot-jaw” styles help grip side-post and top-post terminals.
- Insulation and jacket: Flexible, cold-rated jackets (often rubber or premium PVC) resist cracking, kinking, and abrasion. Bright color coding improves visibility and polarity recognition.
- Strain relief and terminations: Heavy-duty crimping, secure fasteners, and sealed connections prevent hot spots and corrosion where cable meets clamp.
- Amperage and duty rating: Look for continuous-duty ratings, not just “peak” claims. Cables that stay cool under load are safer and more effective.
- Temperature performance: Cold-weather flexibility matters if you drive in winter climates; stiff cables are harder to route and can pull off terminals.
- Storage and organization: A durable carry bag or wrap keeps cables clean, tangle-free, and ready for quick deployment.
- Safety and labeling: Clear positive/negative markings, printed gauge and length, and instructions ensure proper use for every driver in the household.
Red flags for low-quality cables: suspiciously thin, lightweight builds; flimsy clamp springs; minimal metal in the jaws; jackets that smell strongly of plasticizers; and listings that advertise thick “gauge” but hide small actual conductor size under oversized insulation.
Placement, Storage & Readiness
Where you keep your jump cables affects how quickly and safely you can use them. Store them where you can reach them without unpacking half the trunk, and keep them protected from moisture, dirt, and battery acid.
- Recommended locations: trunk well, under-seat storage in trucks, RV utility bays, or a side compartment within reach of the driver. Avoid resting them directly on a vehicle battery when not in use.
- Use a protective bag: A zip case or wrap keeps clamps from nicking upholstery or tangling with cargo.
- Inspection routine: Every 3–6 months, check for cracked insulation, corrosion on clamp teeth, loose fasteners, or broken springs. Wipe off grime with a dry cloth.
- Staging for emergencies: Keep a small kit with gloves, safety glasses, and a headlamp alongside your cables for night roadside use.
- Avoid common mistakes: Don’t coil cables tightly around sharp objects, don’t store them near open chemicals or battery acid, and don’t leave them where heavy cargo can crush the clamps.
How to Use It Properly
Follow these steps carefully. If your vehicle manual provides a specific jump-start procedure or designated connection points, use those instructions first.
- Park the donor vehicle close enough for the cables to reach, but ensure the vehicles do not touch. Engage parking brakes and set both transmissions to Park (automatic) or Neutral (manual).
- Turn off both ignitions and all accessories (lights, HVAC, infotainment). Put on eye protection and gloves.
- Open hoods and locate battery terminals or manufacturer-designated jump points. Identify positive (+, often red) and negative (−, often black) clearly.
- Inspect the disabled battery. Do not proceed if it’s cracked, leaking, swollen, or frozen. Address hazards first.
- Connect the red clamp to the positive (+) terminal of the disabled battery.
- Connect the other red clamp to the positive (+) terminal of the donor battery.
- Connect the black clamp to the negative (−) terminal of the donor battery.
- Connect the remaining black clamp to a clean, unpainted metal ground on the disabled vehicle (such as a solid engine or frame point), away from the battery.
- Start the donor vehicle and let it idle for 2–5 minutes to deliver initial charge to the dead battery.
- Attempt to start the disabled vehicle. If it doesn’t start, wait another minute and try again. Avoid long cranking sessions; several short attempts are safer.
- Once the disabled vehicle starts, let both engines run for a minute to stabilize. Then disconnect the cables in reverse order: remove the black clamp from the grounded point, the black clamp from the donor negative, the red clamp from the donor positive, and finally the red clamp from the disabled positive. Ensure clamps never touch each other or moving parts.
- Keep the revived vehicle running for at least 15–30 minutes or drive normally to allow the alternator to replenish the battery. If it won’t stay running or repeatedly needs a jump, have the battery and charging system tested.
Important reminders: Match system voltage (typically 12‑volt). Keep cables clear of belts, fans, and hot exhaust. Never let clamps touch while connected. In vehicles with advanced electronics, follow the owner’s manual for designated jump points and any special precautions.
Final Summary
Jump cables are one of the most practical, cost-effective tools you can carry. They transform a dead battery from a major disruption into a minor inconvenience, helping you protect your schedule, your safety, and your budget. Choose cables with the right gauge, length, and clamp quality for your vehicles; store them where you can reach them quickly; and share the simple, safe procedure with every driver in your household.
Preparedness is power. Add jump cables to each vehicle’s emergency kit, review the steps occasionally, and inspect your gear every season. With a solid set ready to go, you’ll be the person who turns a roadside setback into a quick, confident restart—whether it’s your car, a family member’s, or a neighbor’s.
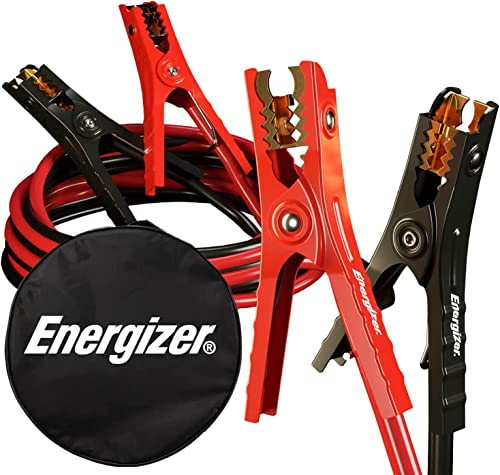
Energizer Jumper Cables for Car Battery, Heavy Duty Automotive Booster Cables for Jump Starting Dead or Weak Batteries with Carrying Bag Included (16-Feet (4-Gauge) Best for most families
- Low‑resistance conductors support high cranking currents and cold‑start demands.
- Flexible, cold‑rated insulation works in freezing, wet environments.
- Color‑coded, fully insulated clamps help prevent polarity mistakes and reduce short‑circuit risk.
- Enables rapid restarts to regain mobility and vehicle power for communications and heat.